Embryo’s Messiah 0.33 - A Moveable Cluster Design for LLLT for Hair Loss

Position 1 - front/temples (rests on front of band)
Position 2 - top of head (rests on head)
Position 3 - crown/back of head (rests on back of band)
OK, first off, my reason for doing this design. I thought I would give OMG's Laser Messiah a go, but was unsure about the kind of results I'd get from lasers, so thought I would go ahead and buy 100 lasers, I didn't want to go spending more than I needed to, in case it didn't work for me (only time well tell about that, as I've only been using this for two weeks!) So, having built the full Laser Messiah with 100 diodes at the front (where I'm thinning the most) I thought hmm, what about the rest, and was initially maneuvering it around to cover my head which seemed kind of impractical, so I thought I would see what I could do with a bit of spare 6mm foam that was lying around.
As I began from the Laser Messiah, this was my base for a new helmet, so the first thing you need to do is make the headband for the Laser Messiah, the rest of my instructions will assume you've made the headband already.
So, the next thing to do is to figure out how wide we need to make the laser foam piece, to do this, put the headband on your head get a tape measure and measure the distance from the front of your head to the back (for me it was 25cm). As we're going for three zones, you need to divide the distance by 3, and this will be the width of our laser foam piece (25/3=8.33cm). So now we have the width, you also need the length. To do this, again with the headband on, get the tape measure and measure the distance over the top of your head from side to side, and add at least 1cm to each side so there is plenty of space to add the hinge.
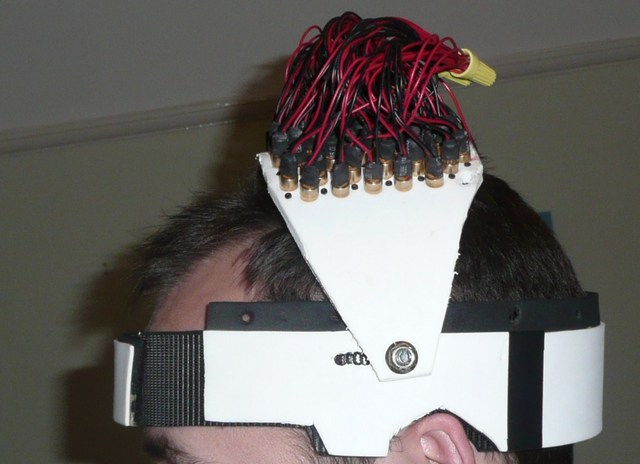
So cut your foam to the right size, and now its time to space out your diodes, and obviously as I have 100 thats what I'm going to base this tutorial on. Get your gutter guard (or template) and from the centre of the foam space out your diode holes. I ended up with a 13 by 6 configuration which is actually 102 diodes, close enough! The next thing to do is taper out your foam towards the end. You want to leave at least an inch wide for your hinge point, so taper out from your last diode point toward the centre of the edge. I did a bit of a rough guestimate for this but you can measure it properly if you like. Then you need to punch out the holes and use the brush bristles, I would suggest following OMG's guide for this, and then you should be left with a piece of foam as below:
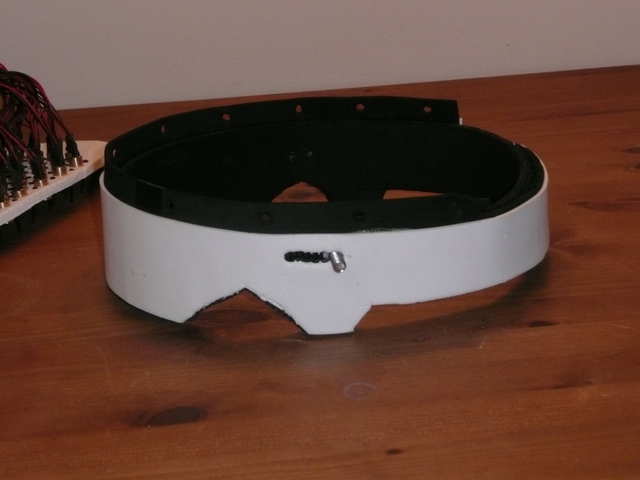
Notice the holes at the end of the piece above? well these are for my hinge points, and before I created these holes, I pushed a small nail through at each end and placed the foam piece on top of my head in position 1. Now, push the nails in to the headband when you are comfortable to mark off your first hinge point. Now before you punch a hole through this, I would advise testing on a bit of spare foam, as you want the screw to fit as snug as possible, I can't remember the exact size of punch I used, but it all depends on the screws you are using. My screws are the type you get to rack servers (and we have hundreds in our computer room in work!) they're short and stubby with a flat end. I'll get exact dimensions and a photo soon.
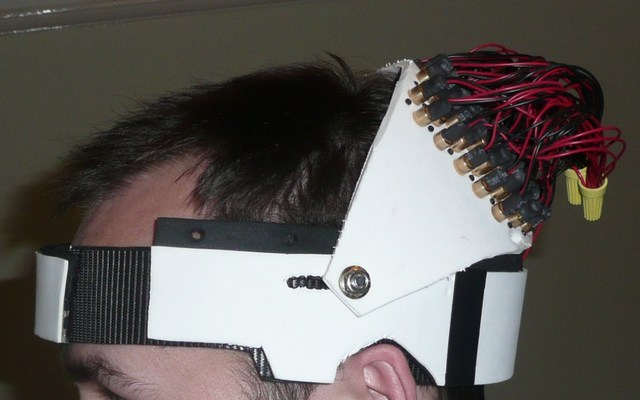
Before you make a hole for your hinge in the headband, remember you don't want to go all the way through, just the outer part, otherwise the screw head will be rubbing on your head, and probably wont move as easily. So, pull the inner part of the headband away (remember its velcroed together?) and punch your hole, and insert your screw with the head on the inside. Now stick the velcro parts back together and do the other side. Now at this point, you should be at the picture below. You'll probably find that the laser piece moves fine from position 1 to position 2, but to get to position 3, you need to move the headband.
Now, if your head is perfectly spherical, you may be able to go straight to position 3 without a problem, in which case brilliant! However, its more likely that for the back of your head the hinge point could be a little further back. So, take the top part of the hinges, and position it comfortably in position 3, then do the same as above to create a second hinge point. Of course if you really wanted to, you could just leave it at that, put in another screw and have two points at each side, and physically move the laser foam piece off the one hinge, and on to the other. But I didn't want to do that, I thought I'd take a chance and maybe, ruin the headband, but what the heck!
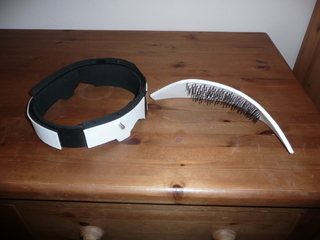
I created a channel between the two hingepoints by punching holes all the way along from the one point to the other as shown:
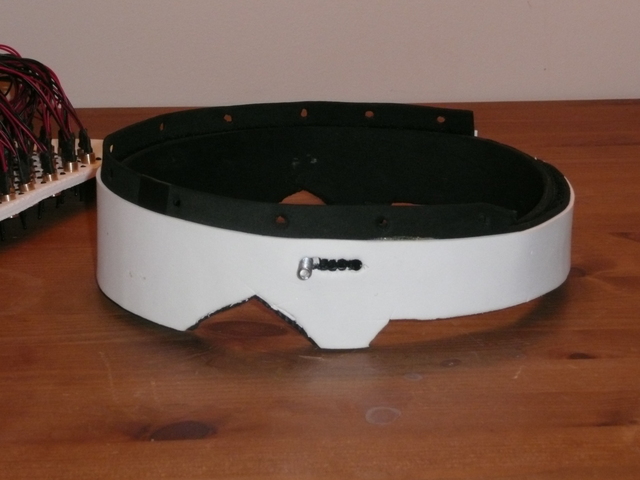
The results are actually really good, it allows you to move the laser foam piece really easily.
Future changes
Thats it for now, but I may consider putting in another screw closer to the front on either side, and perhaps the back so its not resting on the front of the headband , as the bristles tend to get bent a little. Also, a method of ensuring there is no overlap, but for now, I'm just using a bit of spare foam the same width as the laser foam piece, to measure where I've just been.
-Embryo

.jpg "The World's Greatest Laser Helmet for Hair Loss")
.jpg)
.jpg "EMFs and Laser Helmets")
.jpg "Lasers vs. LEDs -there is no competition!")
.jpg "Calendar of Laser Therapy Usage")
.jpg "Additional Common Coverage Patterns of the Laser Messiah II")
.jpg "PulseDrive Introduction Video")
.jpg "Common diode patterns for the Laser Messiah II")
.jpg "The Laser Messiah II works WORLDWIDE!")
.jpg "The laser helmet for hair loss that changed the world")
.jpg "Fitting Instructions for the Laser Messiah Video Screenshot")
Comments (0)
Login | Register