Common Patterns for the Laser Messiah Laser Helmet for Hair Loss: 300/366/400 diode footprints explained!
.jpg)
.jpg)
It's always hard communicating the coverage of a laser helmet. This is why it's absolutely FANTASTIC that you can always UPGRADE the amount of diodes at a later time. I can either do it (and I've never charged more than the amount of the extra diodes and shipping back to you --no labor/additional supplies or anything like that because I know you will be so much happier with more diodes), or I can help YOU to do it! I actually can send the supplies already prepared and email you some helpful graphics (or make custom graphics to show you EXACTLY how you do it) so you won't even have to be without your helmet for one single day!
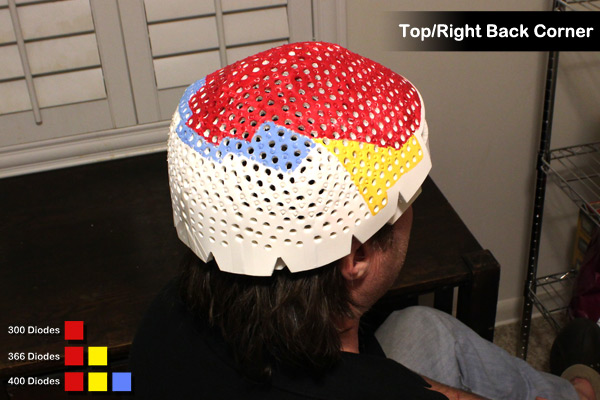
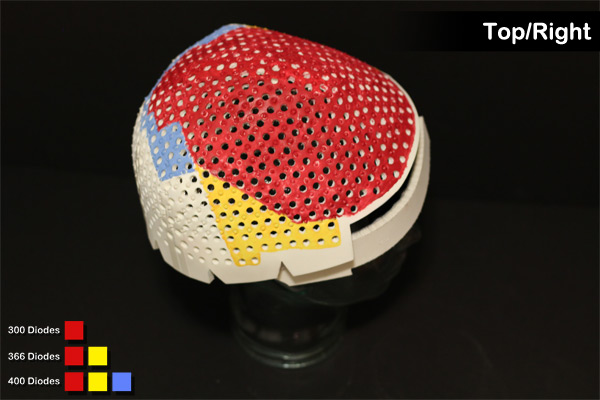
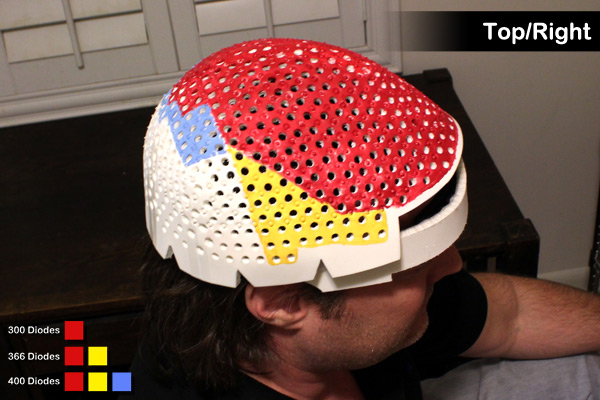
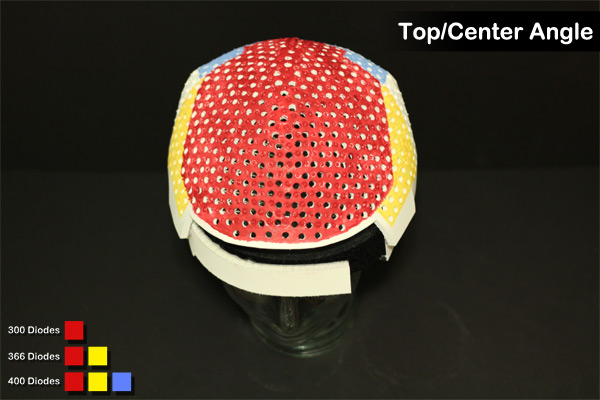
BUT... I know most people would rather just GET IT RIGHT the first time, and just START USING THE HELMET!!! Yes, I have some sheets that help determine the number of diodes (mostly for do-it-yourselfers), but, after hearing from hundreds of you, they really aren't the best, accurate way the do this! So, after thinking about it, the best way for me to do it was to paint the most common zones of the Laser Messiah, put the helmet on my head (and the glass head as well so you can compare it to something smaller), and take pictures.
Obviously, this helmet is FULLY-CUSTOMIZABLE (and that fact by itself makes it the BEST laser helmet on the planet!). and I build all sorts of increments and footprint patterns -so, by no means should you feel "locked into" these patterns. However, over time and through lots of feedback, I've been able to develop some "tried and true" standard laser diode footprint patterns that take a lot of the guesswork out of it! These are the 300/366/400. [Update: actually my second most common patterns are tied between the 334 and the 418 now, and I will have another article explaining those! Look for it!]
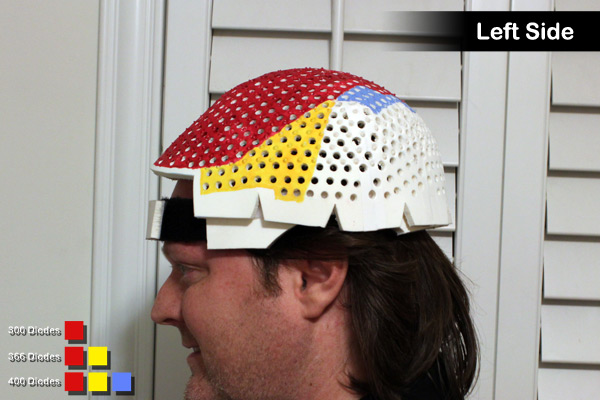
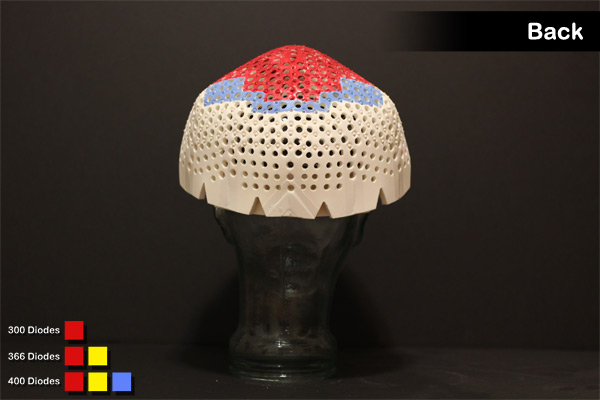
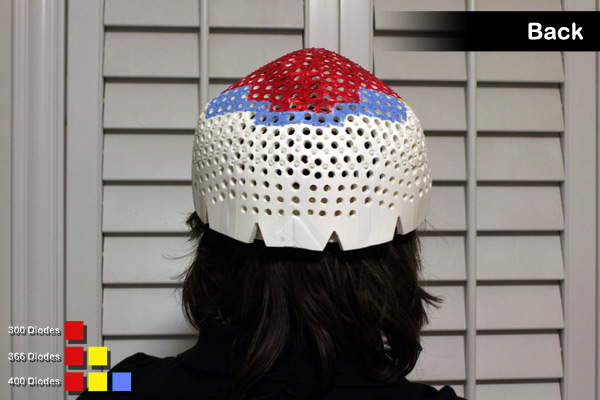
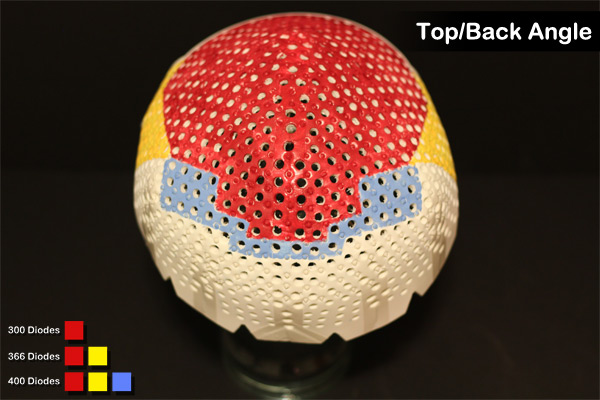
Here are the color coded areas:
- The 300 diode helmet -far and away my most common- is the RED area.
- The 366 diode helmet is the RED AND YELLOW areas. The addition of the yellow area is for increased side coverage.
- The 400 diode helmet is the RED, YELLOW, and BLUE areas --basically, everything that you see painted! This is for additional side coverage AND additional, wider crown coverage.
If you're colorblind... I'm sorry! lol... Skype me, and I'll show you in person. :)
Now, first of all, one thing that I want to cover is that a lot people don't realize how WIDE the 300 diode footprint coverage is. I have big hands --I'm a big guy anyway -6'4" and in these pictures from a few years ago, I was an embarrassing 275 pounds (I'm a solid 50 pounds less than that in 2016, and hopefully still dropping steadily!).
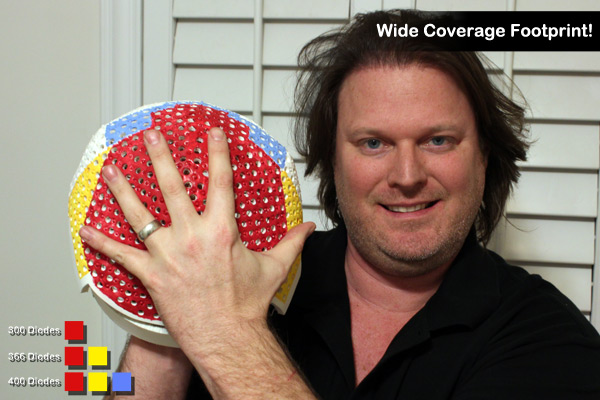
...and you see that my hand fits pretty well in that 300 diode footprint! If you put your own hand over your head, you'll see that this is a big coverage area.
So, without a doubt, my 300 diode laser helmet has the most coverage of any other device --aside from my own laser helmets with more coverage!
Since I'm a large human being, if you are SMALLER (and have a smaller head), then expect that your helmet will fit an even bigger area. This is definitely an advantage.
Speaking of head side... yes, I have a very large head, and you must take this into account when you are looking at the pictures! It's right at about a 24" circumference (about 61cm), which is roughly slightly larger than a 7 5/8ths hat size (and that size fits me, but I wish there was an in-between size with the next step up!). Yes, the helmet can fit larger heads, by the way. ...and smaller, of course --it is indeed "one size fits most", and we can work out some sort of advance shipping with a "helmet only" for you to verify this if need be.
You also need to take into account that the helmet is raised over the surface of the scalp, supported by 500-something plastic spacers (brush bristles, technically)! So, there is a bit more coverage than what is being shown because of the fact that the diodes spread out a bit (I *only* use diffused diodes, of course, and if you don't know the difference, you need to read some articles on my site!!!).
Ok, I have two sets of pictures at each angle... one of the helmet on the glass head, and one on MY head. So, hopefully those both together from these 11 different angles will help you get a great idea of what the coverage is:
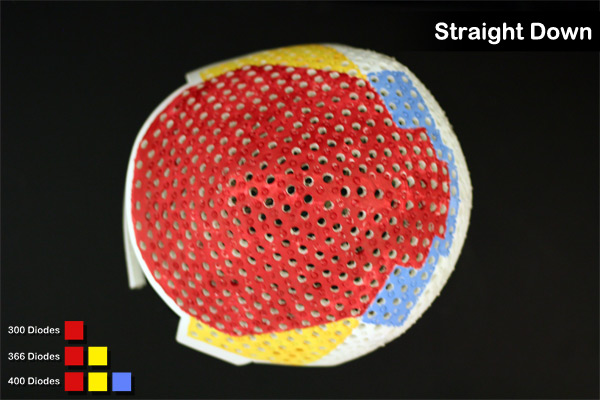
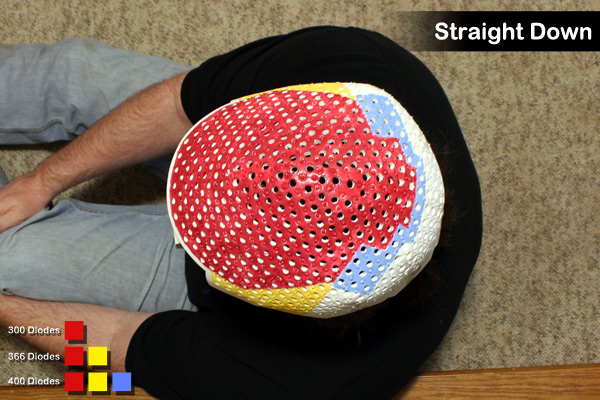
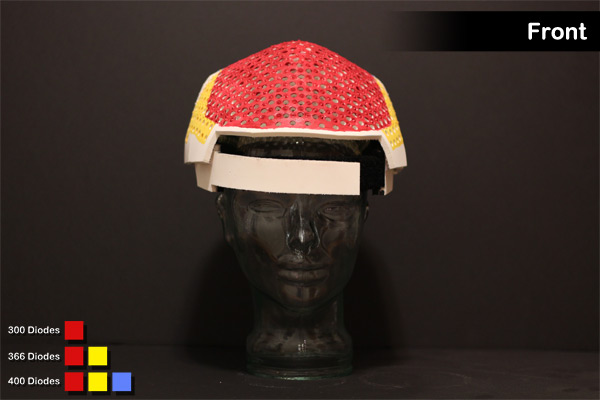
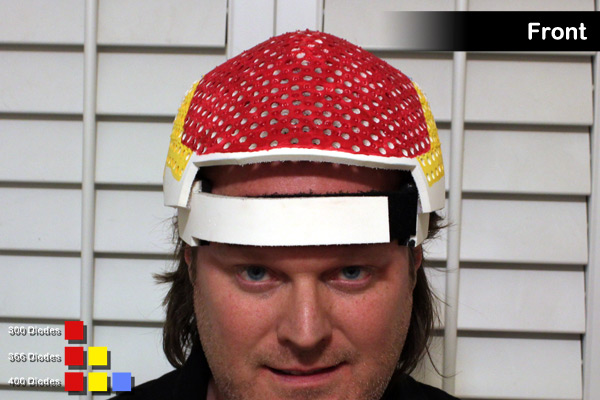
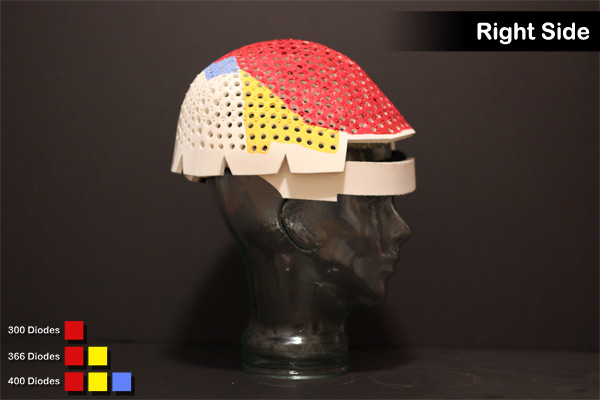
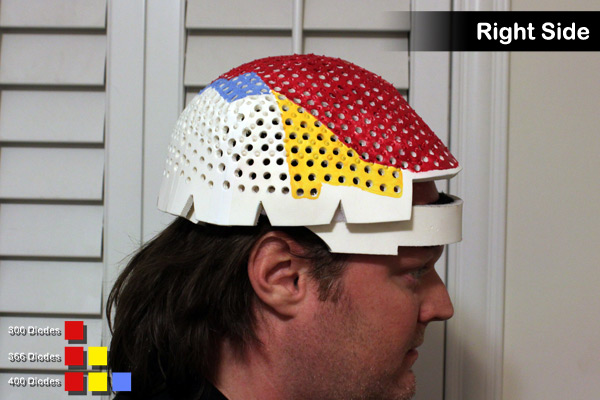
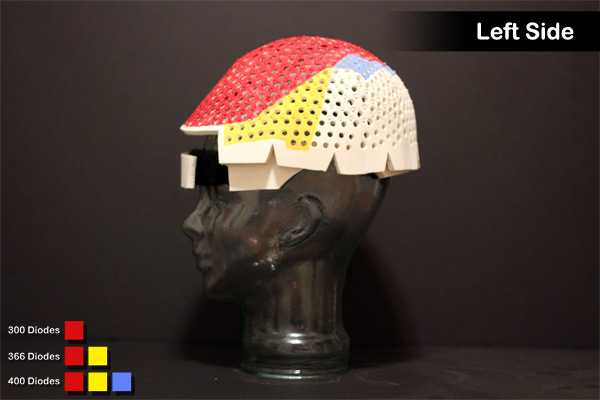
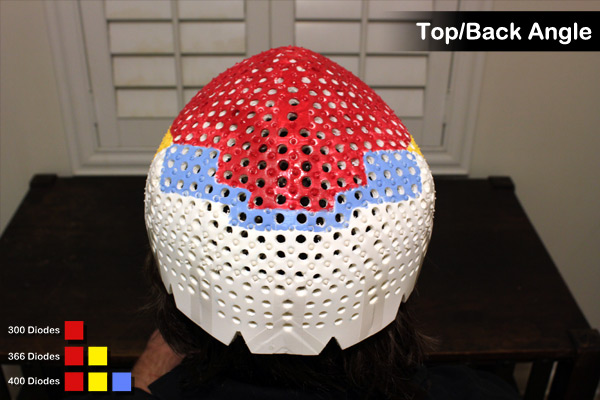
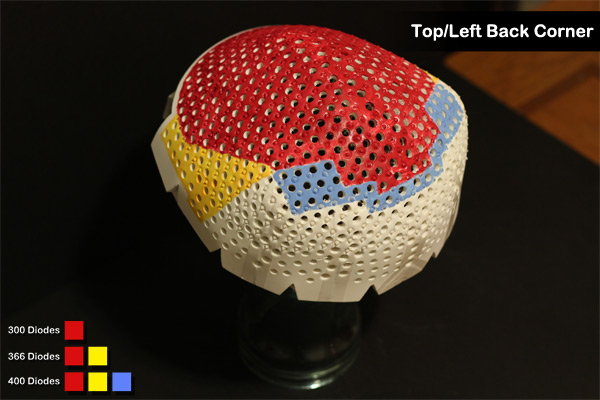
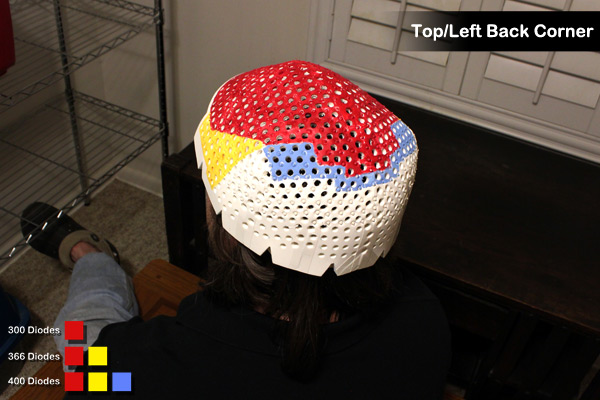
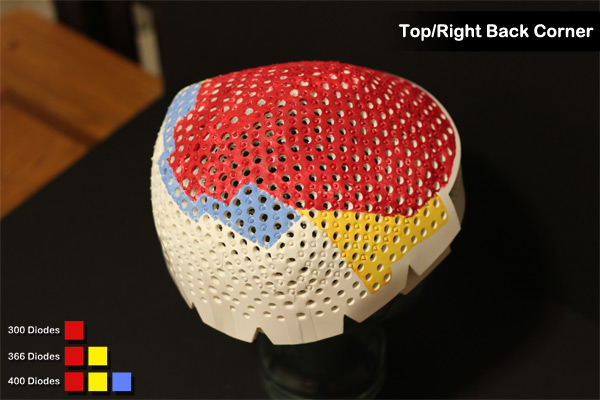
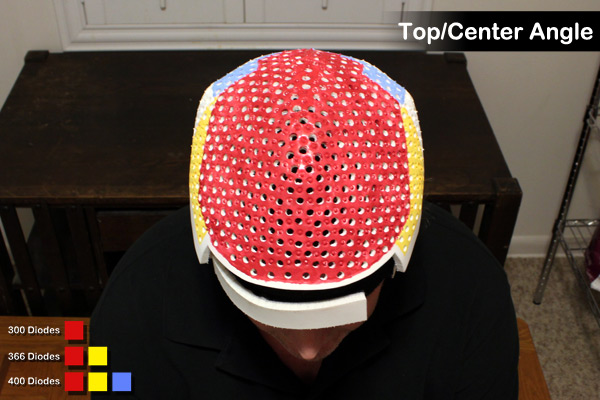
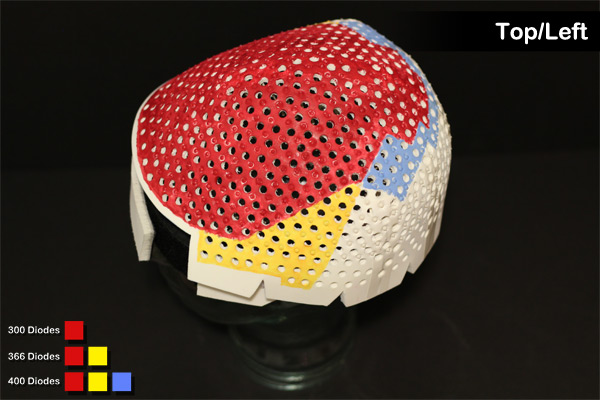
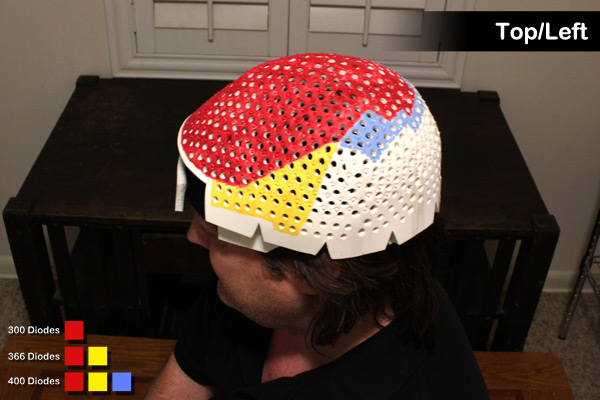
Ok, I hope that helps to clear things up for you, and if not, do not hesitate to email me a omg@overmachogrande.com! One more thing here, though... if you have the type of crown loss that DIPS REALLY LOW IN THE BACK -you know, like you can see it in that back hole of a baseball cap- then you may want to consider adding more to the rear of the helmet, and like I said, I have another article on additional patterns!).
Here is an example in which 34 diode could be added to the rear of a 300 diode helmet:
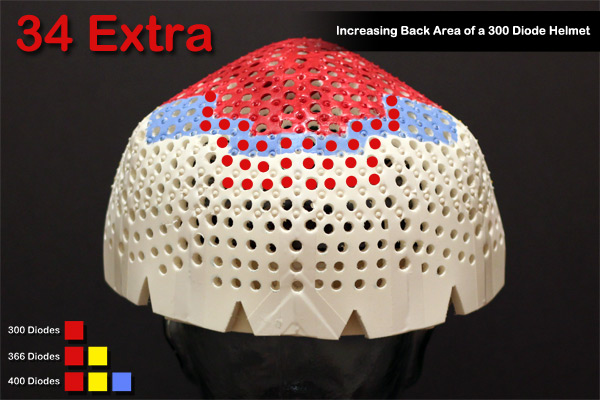
As you've heard me say a million times, the helmet isn't meant to have diodes in every single hole -that's a part of the flexible design! But... I can (or you can) extend it down further if you HAVE TO. Just remember that the power supplies have limitations on the number of diodes, but you can contact me and we can discuss it!
John Christian ("OverMachoGrande")
omg@overmachogrande.com
.jpg)
PS:Also, here is the discussion thread about this in my old forums: http://www.worldhairloss.org/index.php/forums/viewthread/481/
Updated !

.jpg)
.jpg)
.jpg)
.jpg)
.jpg)
.jpg)
.jpg)
.jpg)
.jpg)
.jpg)
.jpg)
Comments (0)
Login | Register